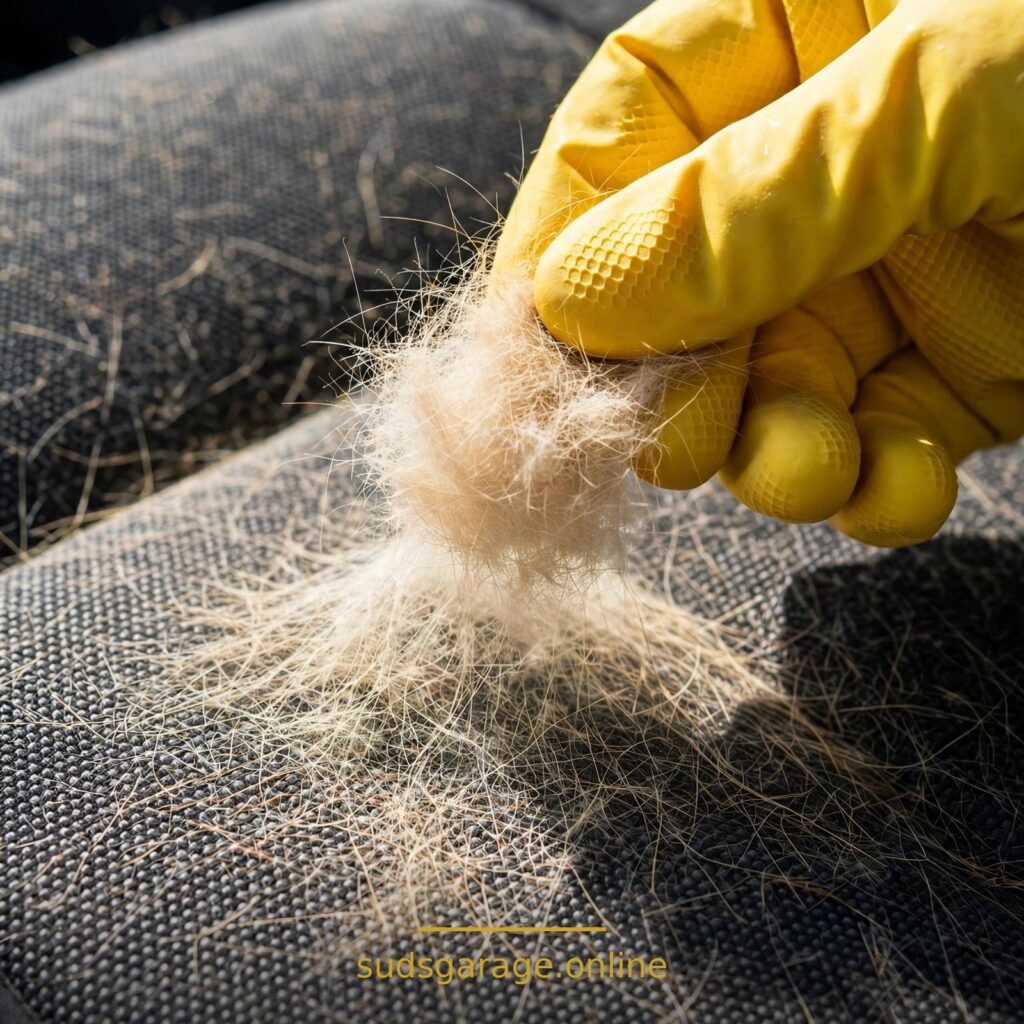
TL;DR: Learning how to remove pet hair from car seats starts with one rule: work dry first and in the right order: clear loose items, vacuum the loose stuff, then use friction — a damp rubber glove, a squeegee, or a rubber pet brush — to gather the embedded hair into clumps, then vacuum again. Wetting the seat first, scrubbing hard, or reaching for abrasive tools is how fabric gets damaged and leather gets scratched. Cloth, leather, carpets, and seams each want a slightly different touch, and this guide covers all four without damaging any of them.
In this guide:
- Why pet hair sticks so stubbornly
- What you need
- Step by step: vacuum, friction, seams, carpets, leather
- Prevention: less hair next time
- Mistakes that damage seats
- FAQ
Why pet hair sticks so stubbornly
Pet hair does not just sit on a car seat — it gets worked into it. Three forces do the damage. First, pressure: every time a dog sits, turns, or jumps down, body weight presses loose fur into the weave of the fabric. Second, static: dry air and synthetic fabrics build a charge that makes fine hair cling to fibers like it was glued there. Third, texture: seat fabric has a weave, carpets have pile, and stitching creates channels — all of them trap hair that a vacuum nozzle passes straight over. That is why vacuuming alone disappoints: embedded hair needs friction to break the static grip first. Friction first, vacuum second, for the stubborn stuff — the order below is built around it.
What you need
- A vacuum with an upholstery brush and a crevice tool. A household vacuum works if it has the right attachments; a small car vacuum is fine for touch-ups but struggles with embedded hair.
- A pair of rubber dish gloves, or a rubber pet hair brush, or a window squeegee with a rubber blade. You do not need all three — one friction tool, plus the vacuum, does most of the job.
- A lint roller for the final pass on light areas.
- A clean microfiber cloth, lightly damp, for leather and vinyl.
- A small brush for seams — an old soft toothbrush or a detailing brush works.
- A bag for the clumps. Hair gathered in clumps has a habit of ending up back on the seat if you leave it lying around.
For the full cabin routine around this job — dashboard, glass, mats, and the order that keeps you from redoing steps — see our DIY interior detailing guide. This article focuses on the hair itself.
Step by step: vacuum, friction, seams, carpets, leather
Step 1: Clear the seat and vacuum loose hair
Take out seat covers, blankets, pet beds, and anything lying on the seats. Shake blankets and covers outside the car — never into the car. Then vacuum the seats with the upholstery brush, using slow, overlapping passes. Slow matters: a fast pass skims the surface, while a slow pass gives the brush time to lift hair. Vacuum the seat backs, bolsters, headrests, and the gaps between cushions. This first pass removes the easy hair and the grit sitting with it, so the friction step works on the stubborn stuff instead of pushing dirt around.
Step 2: Gather embedded hair with friction
Put on a rubber glove, lightly dampened — damp, not dripping. Wipe in one direction, firm overlapping strokes, top to bottom. Hair gathers into clumps in front of your hand; bag them as you go, rinsing the glove when it loads up. A rubber pet brush or a window squeegee works the same way: short, overlapping strokes in one direction, collecting the clumps. The squeegee is especially good on flat, broad areas of cloth seats; the glove is better on bolsters, curves, and seams where a flat blade cannot follow the shape. Whichever tool you use, keep the pressure moderate. You are gathering hair, not scrubbing a stain — hard scrubbing pushes hair deeper and wears the fabric.
Work dry fabric. This is the key rule. Wetting the seat first makes hair clump flat against the fabric and harder to lift, and it adds drying time for no benefit. Dampen the glove, not the seat.
Step 3: Seams, edges, and the spots everyone misses
Hair collects hardest where seats meet: the channel between the seat back and the seat bottom, around the headrest posts, along stitching, and in the gap between the seat and the center console. Run a gloved finger or a soft brush along these channels, then follow with the crevice tool. Check under the front seats too — hair migrates to the carpet under and behind seats, and it blows forward again if you leave it.
Step 4: Carpets and floor mats
Carpet is the most forgiving surface for friction tools, and the one place a firmer touch is acceptable. Use the rubber brush or squeegee on carpeted floor areas and carpet mats, then vacuum slowly. For rubber mats, take them out of the car, shake them, and wash them with soap and water outside — hair rinses off rubber easily once it is out of the car. Let mats dry fully before they go back in. One warning for carpets: do not use a pumice stone on seats, and be cautious even on carpets. Pumice can lift embedded hair from carpet pile, but it is abrasive — keep it off upholstery, leather, vinyl, plastic, and stitching entirely, and test it on a hidden carpet corner first if you use it at all. Most cars never need it; the glove and squeegee do the job.
Step 5: Leather and vinyl seats
Leather and vinyl do not trap hair the way cloth does — hair mostly sits on the surface or slides into seams and perforations. Vacuum with the brush attachment, wipe with a lightly damp microfiber cloth, and use a gloved finger for seams. Do not use abrasive brushes, pumice, or strong adhesive rollers on leather: they can scratch the surface or pull at coatings. After hair removal, leather benefits from its normal clean-and-condition routine, which our guide to how to clean leather car seats without cracking them covers in full.
Step 6: Final pass and check
Run the lint roller over the seats for the fine, light hairs that friction and vacuum leave behind. Then sit in each seat position — or at least look at it from the angle a passenger would — and check bolsters and headrests in daylight. Hair hides in daylight angles that garage lighting misses. One final slow vacuum pass picks up anything the roller loosened.
Prevention: less hair next time
You cannot stop shedding, but you can stop most hair from reaching the seat. A washable seat cover or blanket catches the majority — and washing a blanket is far easier than de-hairing a seat. Brush the pet before rides in heavy shedding seasons, keep a small kit in the trunk (glove, lint roller, bag) for a two-minute pass after each ride, and vacuum the same day when you can: fresh hair lifts far more easily than week-old hair.
Mistakes that damage seats
- Wetting the seat first. Wet hair clumps flat and grips harder. Work dry, with only the glove damp.
- Scrubbing hard. Hard scrubbing pushes hair deeper into the weave and wears fabric. Firm, one-direction strokes gather hair; scrubbing does not.
- Abrasive tools on upholstery. Pumice stones, stiff brushes, and scouring pads cut fibers and scratch leather. Keep abrasives off seats entirely.
- Strong adhesives on leather and vinyl. Heavy-duty tape and aggressive lint rollers can pull coatings and finishes. Use light rollers and microfiber on leather.
- Soaking cloth seats. Drenching a seat to “wash the hair out” leaves damp foam that smells musty for days. Hair removal is a dry job; cleaning is a separate, light-moisture job.
- Skipping the seams. Cleaning only the flat seat surfaces and ignoring channels and gaps means hair blows back out within days. Seams are part of the job.
FAQ
What is the single best tool for pet hair in a car?
For most cars, a damp rubber glove or a rubber squeegee, followed by a vacuum. They are cheap, reusable, and they beat lint rollers on embedded hair by a wide margin. A lint roller is a good final pass, not the main tool. If you buy one dedicated tool, make it a rubber pet brush — it does seats, carpets, and mats.
Does fabric softener spray help?
A very light mist of diluted fabric softener can reduce static on cloth — but use it sparingly, test a hidden spot first, and never soak the seat. It helps the friction step, it does not replace it, and on leather it is unnecessary.
My dog rides on leather seats. Is the job easier?
Yes, mostly. Hair sits on leather rather than embedding in it, so vacuuming and a damp microfiber wipe handle most of it. The work moves to seams, perforations, and the carpets below, where hair slides off the seat and collects. The caution is the reverse of cloth: avoid abrasives and strong adhesives that can mark the leather surface.
How often should I de-hair the car?
After every pet trip if you can manage a two-minute pass, and a full session whenever hair is visible on the seats. Hair that sits for weeks gets pressed deeper with every ride and takes much longer to remove. A quick pass after each trip is less total work than a monthly deep session.
The car still smells like dog after the hair is gone. What now?
Hair carries odor, but so do the seats themselves after repeated trips. Once the hair is out, clean the upholstery lightly with a fabric-safe cleaner, let it dry fully with the doors open, and check the cabin air filter — it traps pet odor and dust, and replacing a dirty one makes a real difference. If a smell survives a full clean, look for a forgotten spill or a damp mat before reaching for a deodorizer.
Closing note: SudsGarage is a DIY information blog, not a detailing service. Nothing here is a booking offer, and no result is guaranteed — coat type, hair type, and seat material all affect the outcome. If a seat has torn fabric, cracked leather, or damage under the hair, fix that first rather than scrubbing harder.