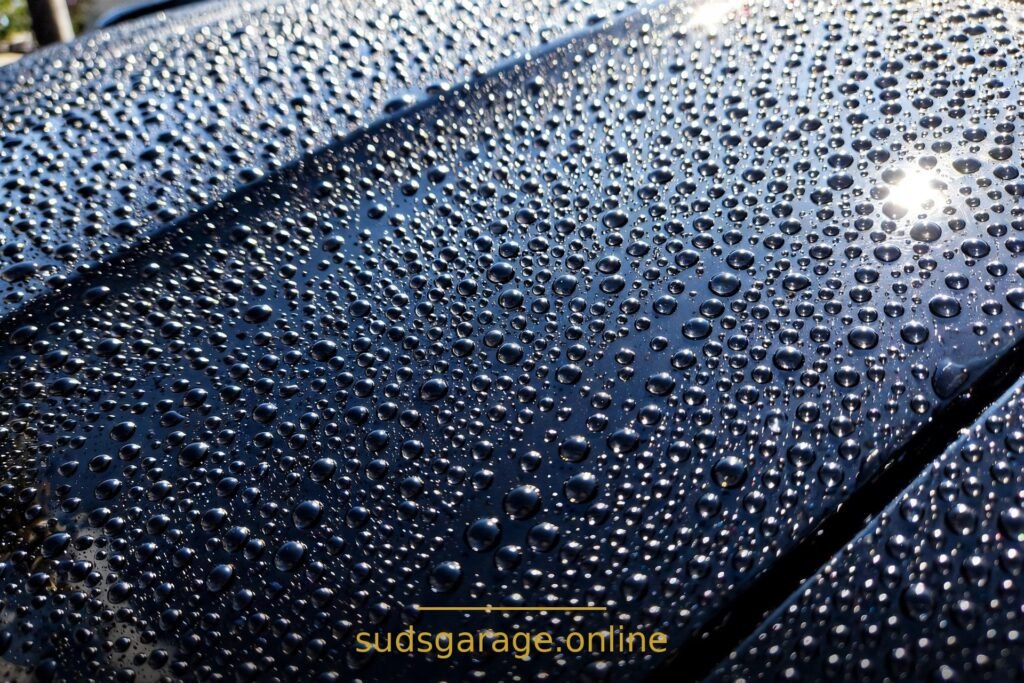
TL;DR: Ceramic coating at home is worth it for most beginners — with one big condition: pick the right product type for your skill level. A ceramic spray is genuinely beginner-friendly and gives most of the real-world benefit. A wipe-on consumer coating is doable if you prep carefully and follow the cure instructions. A professional-grade coating in a tiny glass vial is not a beginner product, however the ads make it look. Prep matters more than the bottle: coating over dirty, swirled paint locks those defects in. And no coating makes paint scratch-proof or wash-free.
In this guide:
- What ceramic coating actually is (and what it is not)
- The three DIY options, honestly compared
- Is it worth it? A decision framework
- Prep: the part that decides everything
- Step by step: applying a beginner-friendly coating
- Mistakes that ruin coatings
- FAQ
What ceramic coating actually is (and what it is not)
A ceramic coating is a thin, hard, transparent layer that chemically bonds to your car’s clear coat. Once cured, it is hydrophobic — water beads and sheets off — and it resists UV, bird droppings, bug splatter, and road grime better than bare paint or wax. That is the real benefit: easier washing, slower contamination, and paint that stays cleaner between washes.
What it is not: armor. It does not stop stone chips or deep scratches, it does not make your car self-cleaning — a coated car still gets dirty, it just washes more easily — and it does not last forever or replace washing. Anyone promising “never wash your car again” or “scratch-proof paint” is selling a fantasy.
It also does not hide damage — the point beginners miss most. A coating is transparent and locks in whatever is underneath: swirls, oxidation, and water spots before coating stay there after coating, under a shiny layer. Prep is not optional; it is the job itself.
The three DIY options, honestly compared
Ceramic sprays
Spray on, wipe off, buff. This is the beginner product. Durability is typically months rather than years — think 3 to 12 months depending on product, climate, and washing — but application is forgiving, mistakes wipe off, and the cost is low. For a daily driver, a spray is often the smartest first coating.
Wipe-on consumer coatings
A liquid applied panel by panel with an applicator block and cloth, then leveled after a short “flash” time as it starts to haze. Durability is longer — often one to three years with proper maintenance — but the application window matters. Apply too thick, miss the flash time, or work in the wrong temperature, and you get “high spots”: streaky patches where excess coating cured on the surface. They can usually be polished off, but that is extra work. This suits a careful beginner with a garage and a free weekend — not someone rushing before rain.
Professional-grade coatings
Tiny glass vials, fast flash times, strict temperature and humidity requirements, and an expectation of machine polishing first. These are not beginner products, and buying one does not turn a driveway into a detailing bay. If you want this level, a professional installer — who corrects the paint first in a controlled space — is the honest route.
The pattern is simple: the longer the claimed durability, the less forgiving the application. Beginners should start at the forgiving end.
Is it worth it? A decision framework
Yes, start with a spray, if:
Your car is a daily driver, you wash it yourself every couple of weeks, and you want easier washing and better beading without a big commitment. This is the majority of beginners, and a spray delivers on that promise.
Yes, try a wipe-on consumer coating, if:
Your paint is already in decent shape (or you have corrected it — see our guide to how to remove swirl marks by hand), you have a garage or shaded, dry space for a full day, and you are comfortable following timing instructions exactly.
No, skip it for now, if:
Your paint is heavily swirled or oxidized and you are not going to correct it first — coating over that just preserves the damage. Or if you have no covered space and no dry, mild-weather window: coating in sun, wind, or impending rain invites high spots and contamination. Or if you want a coating to replace washing — it will not.
Consider a pro, if:
You want multi-year durability, a warranty, or your car has heavy damage that needs machine correction first. There is no shame in that; it is the right call for a show car, a new car you plan to keep for a decade, or paint that is already in trouble.
Cost, honestly:
A spray costs little more than a bottle of wax, and a wipe-on kit still costs far less than a pro job. The hidden cost of DIY is time — prep and application take the better part of a day, and redoing a panel takes longer. Judge the deal on total cost including your time, not just the bottle price.
Prep: the part that decides everything
Prep is where coatings succeed or fail, and it is mostly work you already know:
- Wash properly. Use the scratch-safe routine in our guide to how to wash a car without scratches — two buckets, clean mitts, dry fully. Coating over dirt or wash residue is the fastest way to a bad result.
- Decontaminate. After washing, feel the paint. If it feels rough, bonded contaminants remain — a clay bar or mitt with lubricant removes them gently. Skip this and the coating bonds to contamination, not paint.
- Correct what you can. Light swirls can be improved by hand; deeper damage needs a machine or a professional. At minimum, understand what will be locked in and accept it before you coat.
- Panel wipe. Most coating brands sell or recommend a panel-wipe or diluted isopropyl alcohol solution to remove polishing oils and old wax before application. Follow the product’s guidance here — residue under a coating is a bonding failure waiting to happen.
- Pick your window. Mild temperature, shade or garage, no wind blowing dust, no rain for the full cure time the label states. Check the forecast, not just the sky.
Do not rush prep to get to the “fun” coating step. Prep is the coating step; application is just the last ten percent.
Step by step: applying a beginner-friendly coating
The steps below describe a ceramic spray, the product most beginners should start with. A wipe-on coating follows the same prep, then its own panel-by-panel application and flash timing — always follow that product’s label over any general guide, including this one.
Step 1: Work one panel at a time
Start with a flat, easy panel — roof or hood — to learn the product’s behavior before curves and edges. Spray onto a clean applicator or the panel as the label directs, spread evenly, then buff with a second clean towel.
Step 2: Buff to a clear, even finish
After spreading, buff until the panel looks clear and uniform, flipping to a clean towel section often. Check from a low angle in good light: streaks or dull patches mean product is still sitting there. Buff again. For a spray, this is the whole difficulty level — and it is low, which is the point.
Step 3: Move panel by panel, then let it cure
Work around the car panel by panel. Do not coat trim, unpainted plastic, or glass unless the product specifically allows it. When finished, keep the car dry and untouched for the cure time on the label — usually several hours, sometimes a full day. No washing, no rain, no leaning on panels during cure.
Step 4: Maintain it like a coated car
Wash with a pH-neutral shampoo, dry with clean microfiber, and avoid automatic brush washes. A maintenance spray every couple of months refreshes beading. If beading fades evenly, the coating is wearing and it is time to reapply — normal life, not failure.
Mistakes that ruin coatings
- Coating over swirls and contamination. Whatever is under the coating stays there. Correct and decontaminate first.
- Applying in sun, wind, or before rain. Heat flashes the product too fast, wind embeds dust, rain during cure ruins the bond.
- Applying too thick. More product is not more protection; it is high spots, streaks, and wasted product. Thin, even layers win.
- Missing the flash time on a wipe-on coating. Too early and you wipe the coating off; too late and it has already set into high spots. Set a timer and work small sections.
- Coating trim, glass, or badges by accident. Some coatings stain unpainted trim or smear glass. Mask or avoid anything the label does not approve.
- Washing too soon. A wash during cure can strip or mar a coating that would otherwise have lasted a year.
- Expecting scratch-proofing. A coated car still scratches from bad washing. Fix the wash routine first — coating protects paint, it does not forgive bad habits.
FAQ
How long does a DIY ceramic coating last?
A spray typically lasts 3 to 12 months depending on product, climate, and washing. A wipe-on consumer coating, properly applied and maintained, often lasts one to three years. Treat any “lifetime” claim with suspicion — coatings wear.
Does ceramic coating prevent scratches?
No. It adds a thin sacrificial layer that resists light marring better than bare clear coat, but it does not stop stone chips, deep scratches, or swirls from bad washing. Think of it as easier cleaning and better chemical resistance, not armor.
Can I apply ceramic coating over wax?
No — strip the wax first. Coatings need to bond to clean clear coat, and wax sits between the coating and the paint. A panel wipe after washing and claying removes old protection so the coating can bond properly.
Can I wash my car normally after coating?
Yes, with a pH-neutral shampoo and clean microfiber drying. Avoid harsh detergents, brush washes, and dirty towels — the habits that damage uncoated paint damage coatings too, just more slowly.
What happens if I mess up a panel?
For a spray, wipe it off and redo it. For a wipe-on coating, a high spot can usually be polished off once cured and the panel redone. If a whole car goes wrong, a detailer can polish the coating off and start over. A mistake is recoverable; it is rarely permanent.
Closing note: SudsGarage is a DIY information blog, not a detailing service. Nothing here is a booking offer, and no result is guaranteed — paint condition, product choice, weather, and application all affect the outcome. Always follow the specific product’s label over any general guide, and when in doubt, start with the most forgiving product type.