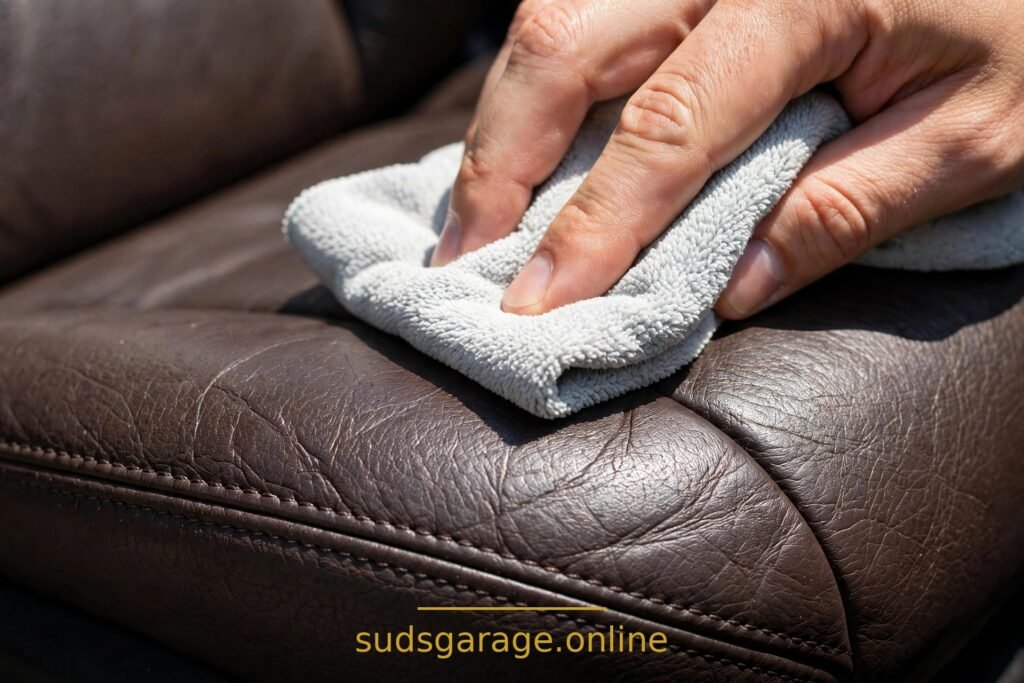
Learning how to clean leather car seats without cracking them starts with why leather cracks: it loses moisture and flexibility — usually from harsh cleaners, skipped conditioning, sun, and heat. Clean gently: vacuum first, test the cleaner in a hidden spot, apply a pH-balanced leather cleaner to a cloth (never pour it on the seat), wipe in small sections, let the seat dry naturally, then condition with a thin, even layer. Never use bleach, ammonia, or alcohol-heavy cleaners on leather, and never dry seats with direct heat or blazing sun.
In this guide:
- First, what kind of leather (or not-leather) you actually have
- What you need
- Step by step: vacuum, test, clean, dry, condition
- Perforated leather and coated leather: the special cases
- Mistakes that dry leather out and crack it
- FAQ
First, what kind of leather (or not-leather) you actually have
Not every seat that looks like leather is leather. Many modern cars use coated leather, where a thin protective coating sits on top of the hide, and many others use synthetic leather — often called leatherette or vinyl — that behaves differently. Coated leather is more forgiving of gentle cleaners but still hates harsh chemicals. Uncoated, aniline-style leather absorbs product quickly and stains easily, so it needs the lightest touch of all. Synthetic leather is tougher against spills but can still crack with heat and harsh products, and it does not benefit from conditioner the way real leather does.
If you are unsure, check your owner’s manual or the trim description for your car. It will usually say whether the seats are leather, coated leather, or synthetic. When in doubt, treat the seat as the more delicate option: gentle cleaner, light moisture, test spot first. That approach is safe for all three, while the aggressive approach is safe for none of them.
What you need
- A vacuum with a soft brush or upholstery attachment.
- A pH-balanced leather cleaner made for automotive use. Avoid household all-purpose cleaners, bleach, ammonia-based glass cleaner, and alcohol-heavy wipes — all of them strip oils and coatings.
- A leather conditioner made for automotive use. For real leather, this is the step that keeps the material flexible. For synthetic leather, follow the product’s own guidance, since heavy conditioner mostly sits on the surface.
- Several clean, light-colored microfiber cloths. Dark or colored cloths can transfer dye onto light leather, and dirty cloths scratch.
- A soft-bristle brush for seams, stitching, and textured areas. Never steel wool, abrasive pads, or stiff brushes.
- Shade and time. Leather work should not be rushed in direct sun.
Step by step: vacuum, test, clean, dry, condition
Step 1: Vacuum first, gently
Vacuum the seats with the brush attachment, including seams, bolsters, and the gaps between cushions. Leather scratches more easily than people expect, and grit trapped under a cleaning cloth will leave fine marks. Hold the nozzle lightly on perforated areas rather than pressing down, which can stretch the material around the holes.
Step 2: Test in a hidden spot
Apply a small amount of cleaner to a cloth and wipe a hidden area — the side of a seat, the back edge, or under a headrest. Wait several minutes and check for color change, darkening that does not fade, or a change in texture. If anything looks wrong, stop and try a milder product. This test takes five minutes and has saved more seats than any other single habit in this guide.
Step 3: Clean one section at a time
Apply cleaner to a microfiber cloth, not directly onto the seat. Pouring cleaner on the seat soaks seams and stitching and, on perforated leather, lets liquid through the holes into the foam underneath. Wipe one section — a seat bottom, a backrest, a bolster — using light pressure and overlapping passes. For textured areas and seams, use the soft brush lightly to lift grime out of the grain, then wipe again with the cloth. Work in small sections so cleaner never sits and dries on the surface. If a section needs a second pass, do it with a clean part of the cloth and fresh cleaner, not by scrubbing harder with a loaded cloth.
Step 4: Remove residue and dry naturally
Wipe each section with a clean, slightly damp cloth to lift cleaner residue, then a dry microfiber towel to take up surface moisture. Then let the seats air-dry naturally, with the doors open or windows cracked if the weather allows. Do not use a heat gun, hair dryer on high heat, or direct sun to speed drying — heat is one of the fastest ways to dry leather out and start the cracking process. Drying usually takes 30 to 60 minutes.
Step 5: Condition with a thin, even layer
Once the seat is fully dry, apply a thin, even layer of conditioner with a clean microfiber cloth or applicator pad. Focus on high-wear areas — seat bottoms, bolsters, and armrests — but cover the whole seat evenly. A thin layer that absorbs is right; a thick, shiny pool that sits on the surface is too much. Let it absorb for the time the product directs, usually 10 to 20 minutes, then buff lightly with a clean cloth to remove excess. The seat should feel soft and matte, not sticky or glossy.
How often to condition depends on use and climate, but every three to six months is a sensible rhythm for most cars. Hot, sunny climates and daily-driven cars lean toward the shorter end; garaged cars in mild climates can go longer. If the leather already feels dry or stiff, condition sooner rather than later — stiffness is the early warning, and cracking is what comes after it.
Perforated leather and coated leather: the special cases
Perforated leather has rows of small holes, and those holes change the rules. Never drench the seat, never pour cleaner on it, and never let liquid pool. Work with a barely damp cloth, blot rather than soak, and dry thoroughly. Moisture that gets through the holes into the foam takes much longer to dry and can leave odors behind.
Coated leather is more resistant to stains, but its coating can still be damaged by harsh chemicals and abrasives. Gentle, pH-balanced cleaning is still the rule, and aggressive scrubbing will wear the coating unevenly, which shows as patchy shine or dull spots. If your coated leather already has worn or peeling areas, be extra gentle there, and do not try to polish or restore the coating with a cleaner — that is a repair question, not a cleaning question.
Mistakes that dry leather out and crack it
- Household cleaners, bleach, and ammonia. These strip natural oils and protective coatings. The seat may look clean immediately and feel dry and stiff a week later.
- Alcohol-heavy wipes and sprays. Occasional light use is one thing; repeated alcohol cleaning dries leather out fast.
- Skipping conditioner. Cleaning removes dirt and some oils. If you clean regularly and never condition, the leather slowly loses flexibility. Cleaning without conditioning is half a job.
- Drying with heat or sun. Parking in full sun right after cleaning, or aiming heat at the seats, bakes moisture out of the leather.
- Scrubbing with abrasives. Steel wool, rough pads, and stiff brushes cut the surface and the coating. Once that damage is there, it does not wash out.
- Soaking the seat. Poured cleaner, dripping cloths, and saturated foam all push moisture where it does not belong, especially on perforated seats.
- Silicone-heavy dressings. They can leave a glossy film that attracts dust and, with repeated use, builds up rather than nourishing the leather. A conditioner made for automotive leather is the better choice.
FAQ
Can I use dish soap on leather seats?
A tiny amount of mild soap diluted in water can work in a pinch, applied to a cloth and wiped off carefully, but it is not ideal for regular use — soap can dry leather over time, and it does not replace conditioner. A dedicated pH-balanced leather cleaner is safer for routine cleaning, and it costs little compared to a seat repair.
How do I clean a stain without making it worse?
Blot fresh spills immediately with a dry cloth — do not rub, which spreads the stain and pushes it into the grain. Then clean the area gently with leather cleaner on a cloth, working from the outside of the stain inward. For set-in stains like ink or dye transfer from clothing, work slowly with a barely damp cloth and accept partial improvement rather than scrubbing aggressively. Aggressive stain removal is a common cause of color loss.
My leather already has small cracks. Can cleaning fix them?
Cleaning and conditioning can improve the look and feel of lightly dried leather and may make fine surface lines less visible, but it cannot repair cracks that have split through the surface. Deep cracking is damage, not dirt, and it needs a leather repair specialist. What cleaning and conditioning can do is stop mild dryness from becoming cracking in the first place.
Should I condition synthetic leather seats?
Synthetic leather does not absorb conditioner the way real leather does, so heavy conditioning mostly leaves a film on the surface. A gentle clean and, if the product is made for synthetic materials, a light protectant is usually enough. Check what your seats are made of before buying conditioner for them.
Why do my seats crack even though I clean them?
Usually one of three reasons: the cleaner is too harsh, conditioning is skipped, or heat and sun are doing the damage between cleans. Cars parked in the sun daily age leather much faster. A windshield sunshade and regular conditioning do more for leather longevity than any single cleaning session.
Closing note: SudsGarage is a DIY information blog, not a detailing service. Nothing here is a booking offer, and no result is guaranteed — leather type, age, sun exposure, and previous damage all affect the outcome. If your seats have deep cracks, peeling coating, or color loss, a repair specialist is the right next step, not a stronger cleaner. For the rest of the cabin, see our DIY interior detailing guide.
Pingback: DIY Interior Detailing Step by Step (Dashboard to Seats, in Order) - SudsGarage